
Accessing Windows 8 System Recovery Console
Windows 8’s System Recovery Console is an important feature that can help you to fix your computer if it’s not booting properly. In System Recovery Tools, you can get tools such as Automatic Repair, Refresh Your PC, Memory Diagnostic, System Restore, and System Image Recovery. There are 2 ways to access the System Recovery Console.
- The most common way to access system recovery is to boot the hidden recovery partition that was set up when Windows 8 was installed on your computer.
- Start your computer
- Press F8 on your keyboard while the manufacturer logo is displayed
- A special boot menu will appear with the option to repair your computer
- Select Repair Your Computer option
- Wait for loading complete
- When the System Recovery Console loaded. You will see SRC’s main screen like image below

Windows 8 System Recovery Console Main Screen
This method usually works on usual Windows 8 installation. If your Windows 8 installed without creating the System Recovery Console partition you can use alternative way to access it.
- If you have Windows 8 installation DVD, you can access it by following these steps
- Start and boot your computer with Windows 8 installation DVD
- Select Repair My Computer
- Wait for System Recovery Console main screen loaded
However, if your computer came with Windows 8 preloaded, or if you lost your Windows 8 DVD, you can create your own SRC boot CD/DVD.
- Put a fresh blank CDR/CDRW/DVDRW/DVDR disc in your DVD writer
- Open start screen
- Type recdisc.exe
- Hit enter
- Make sure the correct drive is selected
- Click create disc
If you don’t have CD/DVD drive. You can create SRC boot by using USB. Follow these steps to create a System Recovery USB on Windows 8
- Insert your USB flash drive
- Open start screen
- Type recoverydrive.exe
- Hit enter
- Navigate to Recovery Drive Window
- Click Next
- Select USB flash drive
- Click Next
- Click Create to verify that everything will be erased on the USB flash drive
Now you have your own custom-made System recovery USB/CD/DVD to access the main screen. To use it, put the media (USB/DVD) in when you starting your computer and use the correct boot menu options.
You May Want to See :
-
 Speed Up Windows 8 Boot Time
-
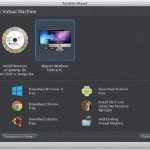 Installing and Running Windows on a Mac
-
 Use Your Own Image for Your User Account Windows 8
-
 What You Should Do If Computer Crash
-
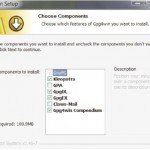
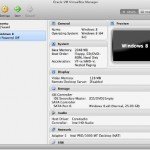 Running Windows 8 Using VirtualBox
-
 Installing and Running Windows 8 Using VMWare Fusion
-
 Rooting with a Locked Boot Loader
-
 Access Microsoft Windows 8’s Power Search Tools
-
 Finding Vulnerabilities In Network Systems
-
 Disable / Bypass Windows 8 Lock Screen
-
 Speed Up Windows Startup
-
 Keep your computer up to speed
-
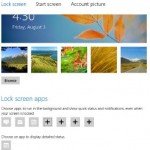 Modify Windows 8 Lock Screen
-
 Set up a digital media library in Windows
-
 Rooting with an Unlocked Boot Loader Android
-
 How to pair Apple Watch with your iPhone
-
 Use the Task Manager to keep track of Application Use
-
 Run Multiple OS Inside Windows 8 Using Hyper-V
-
 Use the Built-In Mini Start Menu Windows 8
-
 Run the Desktop and Window 8 Native applications Side by Side
-
 Simple Way to Encrypt Files


I’ll put that on the list of things I should have done. What I did instead was to download an Ubuntu retail OS and it wiped out windows 8 completely. Hindsight, LOL.
Thanks, Pretty neat guide for accessing windows 8 system recovery console