
Remove Components From Circuit Board
Once you’ve found a component you want to test, or one that’s obviously blown, you need to Remove Components From Circuit Board. Back when all components were mounted on leads pushed through holes in single- or double-sided circuit boards, removal was easy. A little solder wick or a pump of the solder sucker, and the holes would clear. After that, all you had to do was pull.
Sometimes the process is still like that, but now there’s much more variety of component styles requiring different removal techniques, and multilayer boards have complicated the situation. Component removal ranges from trivial to maddening, and it’s easy to destroy the circuit board when a recalcitrant part simply refuses to budge.
Unless both sides of the board are accessible, you’ll have to remove it from the unit before you can desolder anything with leads poking through the board. Either way, first make sure power is disconnected. I always look at the AC plug before beginning to unscrew a board or desolder components, just so I know the plug is definitely lying loose. Even if I remember having pulled it, I take another look.
Remove Components From Circuit Board, Through-Hole Parts
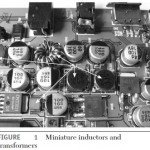
Many larger components still use the old wire-through-the-hole mounting technique. To remove power transistors and other through-hole parts, the solder must be sucked out of the hole, or the lead has to be pulled out while the solder is molten. Clearing the hole is preferable. For small joints, use solder wick, as described before. Place the end of the wick on the joint you want to desolder, and then press the iron’s tip on the other side. Hold it there for about 20 seconds, and the solder should flow up into the wick. See Figure 1.
This doesn’t always work, though. Sometimes the solder won’t flow well enough to clear out the hole. The usual reason is insufficient heat, but transferring the heat to the joint is an issue too, as is thermal absorption by large copper lands. If you can’t get a small land’s hole to clear, try adding some fresh solder, and then wick it out again. Boards manufactured with lead-free solder don’t desolder well. Adding leaded solder to a lead-free joint lowers the existing solder’s melting temperature, making removal easier.
 The wick absorbs some heat too, so it takes a hotter iron to desolder a lead than it does to solder it. Plus, to remove a lead requires wicking out all of the solder in the hole. With thick or multilayer boards, some of it may be a millimeter or more away from the heat source, making the solder hard to melt.
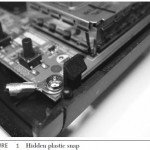
Desoldering is complicated by the increased thickness of multilayer boards and their extra heatsinking effect from internal foils contacting the copper coating inside the holes. Applying enough heat to wick the solder out can destroy the board. To remove a stubborn lead from a multilayer board, it’s best to heat one side while pulling the lead out on the other, and then clear the hole after the lead is gone. Even then, you may struggle with it and be tempted to reach for the big soldering gun. That’s too much heat for small boards, and it can deform them and break internal connections in multilayer boards, wrecking the device. See Figure 2.
Large lands used for power supply and ground buses create a heck of a heatsinking effect. It can be quite frustrating trying to get them hot enough to melt and clear the solder. The big gun might be called for here, but it’s still possible to trash the board because there may be other lines running over the big land inside the layers. Heating up the big land can break them or short them to their adjacent layers.
If a part won’t come out no matter how hard you try, it’s a lot safer to clip the leads and solder in the new part without clearing the holes. Clip the new part’s leads close and solder them to the residual solder in the holes. You should be able to heat a hole enough to make a good joint, even if the solder at the far end of the hole never melts. If there’s room, you can leave a little of the old part’s leads and solder to those.

Sometimes you can’t get to the leads to clip them. On most electrolytic caps, the leads are under the parts, unreachable with any tool. The easiest way out is just to chop off the component near its base with a pair of wire cutters. Then you can clip or desolder the leads easily.
Bigger joints with lots of solder can overwhelm solder wick, saturating it before much solder is removed. To clean out an entire large joint might require a foot of wick, which isn’t cheap. These are jobs for solder suckers. After applying the sucker a few times, you should be left with only a coating of solder on the joint. A sucker will not remove that, so finish up with wick.
Avoid using a spring-loaded solder sucker on
static-sensitive components like CMOS chips and MOSFET transistors. The rapid release of the plunger can generate static charges capable of damaging those parts.
Surface-Mount Components
Wicking surface-mount parts is easier because all of the solder is touching the wick, and many of the lands are very small and readily heated. Most surface-mount pads will desolder without incident. If the solder on a small land won’t flow into the wick, try the same trick I described above: add some fresh solder to the joints before trying to desolder them.
Large lands on power supply and ground buses may still be hard to heat, but a normal iron will take care of most of them. Using a big gun on a surface-mount component is asking to destroy the part and quite possibly the board. Tiny SMT (surface-mount technology) resistors and capacitors have sputtered-on solder pads. Too much heat can delaminate them, making reconnection to the parts’ bodies impossible to achieve.
Most SMT components are glued in place before being machine-soldered at the factory. Very often, desoldering the ends of a part will break the glue and free the part, but not always. If you see a red shellac-like blob around the edges of the component, it’s glued on and may not budge after desoldering. To move it, wick both ends and then heat one end while pushing on the component’s body with a small screwdriver. The tiny part may pop off suddenly and blast away into oblivion if you’re not careful. Somewhere in the universe there must be a room full of sad, homeless SMT parts that flew off circuit boards, never to be found. Plenty of ’em came from my workbench.
You May Want to See :
-
 Recognize Major Feature of A Circuit Board
-
 Opening An Electronic Circuit Without Breaking
-
 Reassembly Circuit Board
-
 Fixing A Broken Laptop
-
 Software Tools For Building Electronics
-
 Tinkering With Portable DVD Players
-
 3 Types of Drones: RTF, BNF, and ARF
-
 4 reasons to keep a home phone
-
 How to Build an Audio Level Controller
-
 Building Your Jukebox to Your Own Design
-
 Top 3D Printers Budget Options
-
 GAW Miners Hashlet
-
 Own Made Automotive Diagnostic
-
 Make Your Own Fish Tank Monitor
-
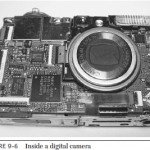 Tinkering With Digital Cameras
-
 Sensor and Alerts For Fish Tank Monitor
-
 Storage Upgrades, Advice For Businesses Of All Sizes
-
 Top 3D Printers Desktop Options
-
 Repairing Noisy Notebook Fan
-
 How to Build a Jukebox
-
 How 3D Printing Pen Work ?


