
Quick Guide to Photographing Fungi
The advent of autumn tends to signal the end of the year’s insect and flower photography, and nature photographers could be excused for thinking that their image-making opportunities were starting to dwindle. Cast an eye on an autumnal woodland floor, however, and the chances are you’ll see a subject as photogenic as any other in the natural world. Fungi come in a variety of shapes, sizes and colours, and a few hints and tips can help you to achieve impressive images of this often overlooked subject.

Pair of Mycena Fungi
WHEN AND WHERE TO FIND FUNGI
While fungi can be found throughout the year, they are particularly prevalent between late August and early December. It is best to look for them early in the morning, before slugs and other creatures have nibbled away at them.
Fungi are typically found among leaf litter and on dead and decaying wood. They thrive in damp conditions and are at their most plentiful during mild, wet periods of weather. Some species are associated with particular habitats or species of tree; for example, fly agarics often grow around silver birch trees.
CREATIVE TIPS
- Fungi images will have far more impact if taken from a low viewpoint. A plastic sheet can therefore be a useful accessory to enable you to kneel on the ground, or even lie flat on your stomach.
- Because fungi tend to grow in dark, wooded areas, lighting can be a problem. A single, diffused off -camera flash or a reflect or can provide added definition and sparkle.
- It can be difficult to isolate fungi from their cluttered backgrounds. One way to do this is to shoot several images using a large aperture (shallow depth of field), each with a slightly different part of the fungus in focus. The images can then be merged in post -processing, a technique known as focus stacking.
- As an alternative to the ‘clean background’ approach, why not deliberately show fungi within its woodland habitat? Wideangle or fisheye lenses work best for this style of imagery.
- As with all close-up work, it is necessary to photograph attractive specimens. Fungi grow rapidly and will tend to look past their best within a day or two of emergence.
- Off-centre compositions can be attractive, so try to place the fungi to one side of the frame. Groups of three fungi also tend to work well (see image below).

TECHNIQUE AND GEAR
Fungi photography is not particularly demanding in terms of gear requirements. For larger species of fungi or for habitattype images, a wideangle, fisheye or even a standard kit lens can be effective. For close-ups of small fungi, a macro lens will work best, with longer focal length macro lenses being the most effective for isolating fungi from their surroundings.
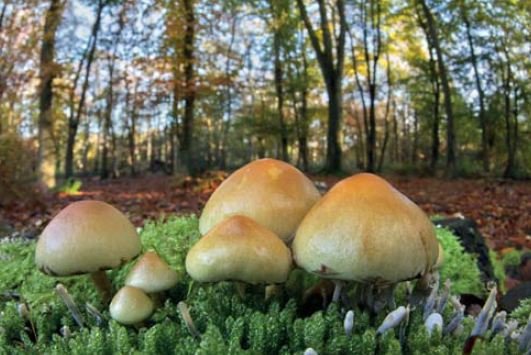
A group of sulphur tuft fungi, photographed with a fisheye lens
Long shutter speeds are oft en required when photographing fungi, so it’s usually necessary to stabilise the camera and lens. A low, folding tripod can be used, but a beanbag can be an easier and more effective option. A swivelling LCD screen combined with live view is a useful way to compose images – and helps to minimise backache!
You May Want to See :
-
 Macro Photography Like A Pro
-
 The Sony Alpha System
-
 Canon EOS 5DS R
-
 Leica S
-
 Sony announces the world’s smallest 30x zoom compact camera with a viewfinder
-
 Sony Cyber-shot DSC RX100 IV
-
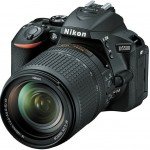 Nikon D5500
-
 Essential Photography Tips & Tricks
-
 Drift Ghost-S
-
 Optimal Camera Settings For Wildlife Photography
-
 Best Accessories You’ll Need in Wildlife Photography
-
 What is a compact system camera?
-
 Camera traps record Serengeti wildlife
-
 The relationship between ISO & image Noise
-
 Three Essential Ways To Improve Composition
-
 5 Things you should know before buying a camera
-
 Basic Techniques For Wildlife Photography
-
 8 Common Composition Mistakes in Photography
-
 Astrophotography – Capturing the Geminid meteor shower
-
 Preparation you need in wildlife photography
-
 Picking the Right Glass for Wildlife Photography


