
Repair Old Photo and Image Using Photoshop Elements 12
Dig out old photographs and load them into Photoshop Elements 12 to restore them back to their former glory in just a few clicks. Follow our steps for using the Restore Old Photo guided edit, and see how it can work miracles on tattered, scratched and torn images.
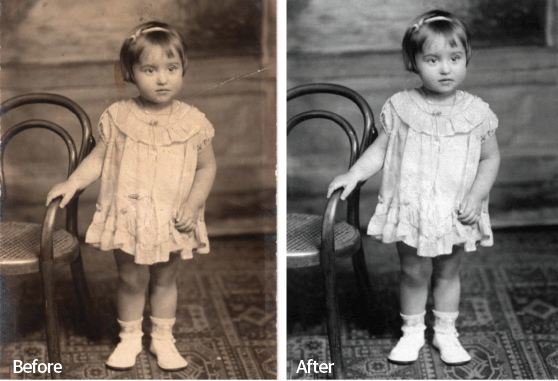 Over time, photos can deteriorate in quality for a number of reasons. These include fading and discolouration, caused by too much exposure to sunlight, or bent corners and scratches from being stored loose in a box. These, along with other factors, can destroy photographs that could reveal clues to our past.
If you have images that have suffered from a tear here, or a crease there, scan them in to your computer and the new Restore Old Photo feature in the latest version of Photoshop Elements offers the right tools for undergoing some serious restoration. From the Spot Healing tool for dealing with those small, indiscriminate blemishes, to the Clone Stamp tool for gradually weeding out larger areas such as tea stains or faded corners, you’re sure to find what you need.
Once all of the blemishes have been cleaned up, converting your image to black and white will remove any discolouration or sepia toning. Sharpening and Dust Removal also form part of this new guided edit, but they are not necessarily required for every restoration project. As a guided edit, Elements makes it very easy for anyone of any ability to follow along, but working knowledge of the tools is still required for making the very best results possible. When you’re happy with the final restoration, we even show you how to really bring the image to life by adding colour. The end result is a transformation worthy of framing on the wall or showcasing in the family tree.
New view mode

Step 1
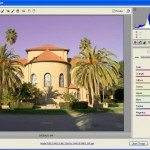
Open an old photo in Elements 12 and click on the Guided tab. Pick the Restore Old Photo option from the list of edits down the right. From the top-left, set the View mode to Before & After – Horizontal.
Spot the marks

Step 2
Crop the image by clicking on the first option. Look to remove raggedy edges and to straighten the image. Click on the Spot Healing tool and draw over small specks and white marks to remove them.
Heal pixels

Step 3
Use the Healing Brush on medium-sized specks and crease lines. Hold Opt/Alt to sample ‘good’ areas and then paint over the ‘bad’ pixels. Use the Clone Stamp in a similar way to fix the largest areas.
Complete coverage

Step 4
Using the Spot Healing, Healing Brush and Clone Stamp tools, go over your image in order to heal the remaining problem areas. Be sure to sample areas of similar pixels so that the results look clean.
Restore colour

Step 5
Finally, click on Convert to Black & White to remove the sepia colour. Using Auto Levels and Contrast will adjust the exposure to normal. Go back over the image with the Blur tool to hide any imperfections.
You May Want to See :
-
 Create A Seamlessly Repeating Pattern
-
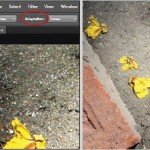 Simple way to remove object inside picture using Adobe Photoshop
-
 Create A 3D Chess Set with Photoshop
-
 Create Geometry Effects Photoshop
-
 Reveal everything with shadows and highlights using Photoshop
-
 How to Invert Image In Photoshop Lightroom
-
 Manage Your Photos From Capture to Output in Three Stages
-
 Blend faces together
-
 How to Process RAW Files in Adobe Camera Raw
-
 Make a Photo Look Old
-
 Best way to light a chocolate scene
-
 Viveza 2
-
 Accessing Windows 8 System Recovery Console
-
 Picasa
-
 Outlook PST Repair Software to Deal With Corrupt Data File
-
 How To Setup eBay Account
-
 Make Your Own Made Reflector
-
 Printing with your phone – Canon Selphy CP910
-
 Recognize Major Feature of A Circuit Board
-
 PLE Achromic GTX970
-
 Why You Should Create Grids With PostCSS-Ant ?


