
Make Your Own Made Reflector
Reflectors are indispensable accessories for photographers. They come in all shapes and sizes, and allow you to sculpt the light falling on your subject by redirecting it. Whether it’s the sun, a desklamp, a flashgun or a torch, most of the shots we take are lit by a single light source. By using a reflector, you can bounce some light from your main source into the shaded side of the subject and reduce contrast in the picture. How you position and angle the reflector will change the way the light falls, and the material used for the reflective surface will alter the character of the shot.
Reflectors are readily available from all good photo stores and websites, and some of the most useful are circular collapsible models that fold down for easy storage. Portable models vary in size from 30cm to 120cm in diameter and come in diff erent colour finishes, but with prices ranging from around £12 to £75, it’s a lot to pay out if you’re not sure of the benefits.
The good news is, reflectors are easy to make cheaply from materials you probably already have around the house. While homemade variants won’t be as robust nor as long-lasting as a shop-bought equivalent, they will give you the same, professional quality photographs.
What you need to build a reflector?
- 1x cardboard sheet
- 1x pair of scissors
- 1x roll of tin foil
- 1x roll of sellotape
- 1x roll of electrical tape
- 1x sheet of white copier paper
- Time needed: 10mins
Four simple steps to a home-made reflector
- Find a piece of stiff cardboard
Find a piece of cardboard that’s the size you want your reflector to be. For many table-top still-life shots, an A4 size is fine. For portrait use, a size of at least A3 is better. You can chop larger sheets of card down to size with scissors, and any relatively stiff material will work, from the side of a cereal packet to a cardboard packaging box. Ideally, pick something fairly rigid as you’ll want it to keep its shape when holding it with one hand.
- Create your low-cost ‘silver’ side
Unroll some tin foil so it’s a little larger than the size you require. Once you’ve done this, cut it to length, and then gently scrunch it into a loose ball. Carefully open it out again, and you’ll be left with a mottled surface. This will ensure that the light it reflects is diffused, rather than giving a mirror finish. Press it down flat. If the foil isn’t wide enough to cover your surface, unroll another piece so you have enough
- Tape the tin foil in place
Stick some double-sided tape all the way around the outer edges of your board. For larger A3 sized reflectors, run a strip down the middle as well. If you don’t have any double-sided tape handy, simply place loops of regular tape around the edge. Now, line up your foil and press it onto the card, then trim off the edges with your scissors.
- Add the finishing touches
For an alternative reflector surface, stick white paper to the other side of the board. Use some Pritt Stick, Blu-tack or clear tape to attach it. Trim off any excess around the edges, and for a tidy finish, run a line of electrical or Gaffa tape all the way around the edge – this will protect the edges and increase the lifespan of your home-spun reflector.

You May Want to See :
-
 Essential Photography Tips & Tricks
-
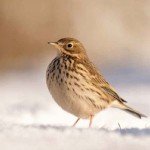
 Preparation you need in wildlife photography
-
 6 GoPro Accesories to Helps You Capture Spectacular Footage
-
 10 Ways to Win Photo Competitions
-
 Western Digital Black2 Dual Drive
-
 Build A DIY Lens Locker
-
 Best Accessories You’ll Need in Wildlife Photography
-
 The Pentax DSLR System
-
 The Sony Alpha System
-
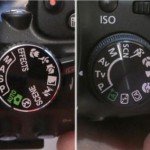
 5 Things you should know before buying a camera
-
 How to keep your camera gear safe?
-
 What is a compact system camera?
-
 Quick Guide to Photographing Fungi
-
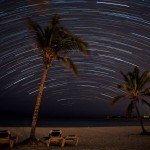 Capture The Movement of The Stars Across Night Sky Like A Pro
-
 Basic Techniques For Wildlife Photography
-
 Optimal Camera Settings For Wildlife Photography
-
 Astrophotography – Capturing the Geminid meteor shower
-
 The relationship between ISO & image Noise
-
 Camera traps record Serengeti wildlife
-
 8 Common Composition Mistakes in Photography
-
 Three Essential Ways To Improve Composition


