
How To Connect Raspberry Pi To A Network
Before we start out, let’s be sure that we’ve ticked off everything on our check-list. You’ll need :
- a Raspberry Pi ( Model B )
- Compatible SD card
- Micro USB cable/charger
- Network cable
- HDMI cable
- Compatible TV
- USB keyboard as well as mouse
You can either use the analogue TV out, but HDMI is strongly recommended. We’ll be aiming for the most common and useful configuration for new users ; a combination of the Raspbian Linux distribution ( commonly called ’wheezy’ ) with an HDMI output from an existing Windows PC.
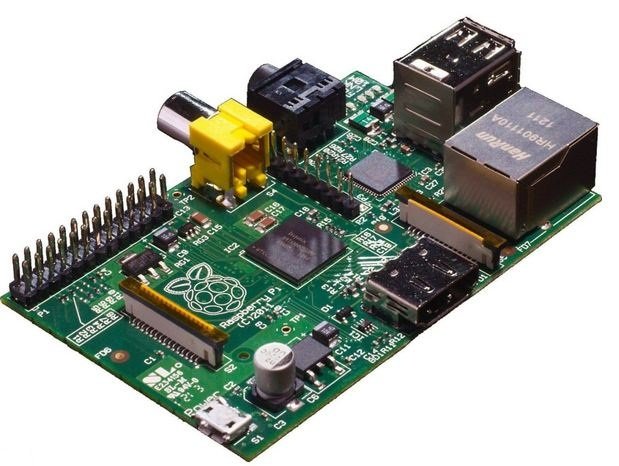
Raspberry Pi
Starting with the OS download we’ll walk through creating the image on your SD card, connecting the peripherals and the set up process. Afterwards we’ll walk through the Raspberry Pi Config Tool options. We’ll expand your SD card partition to fill the full card allowing you more space for applications etc. We’ll change your password from the unsecure default, and we’ll set up all your localisation configurations ; keyboard layout, locale and timezone. If the command prompt isn’t your thing we’ll set the Pi to boot towards the desktop on start up. We’ll even enable SSH ( secure shell ) access so you can open a terminal window across your network. In the end we’ll find out your existing network settings and configure your Pi accordingly.
01: Download Raspbian image

Head to Raspberry Pi website and download the latest Raspbian image, if you download the compressed zip, unzip it to a location of your choosing. Then download Win32 Disk Imager. Unzip and run Win32DiskImager.exe.
02: Creating your image
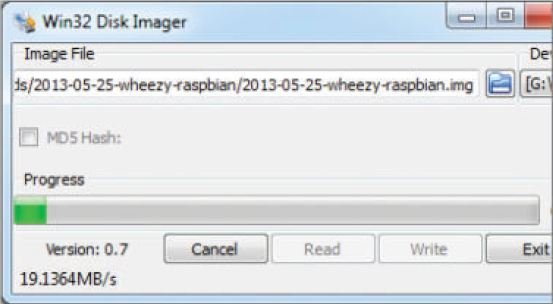
Insert the SD card into an SD card reader. A good tip here for reusing and resetting the partitions on an SD card is to use a camera to format it. Select the drive of the SD card under Device and point to the unzipped image file and hit Write.
03: Connecting your Pi
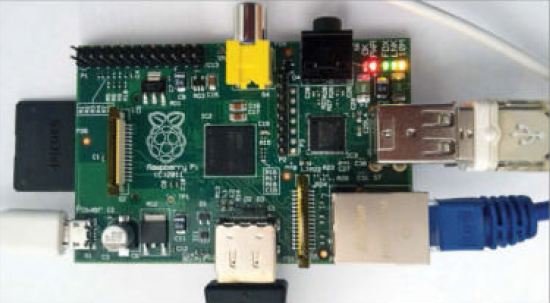
Connect the keyboard and mouse to the USB ports. Connect the network cable from an existing network connection such as your router into the network port and connect the HDMI cable from a TV. Insert the SD card into the Pi. Insert the micro USB cable from a power source.
04: Configure the Pi
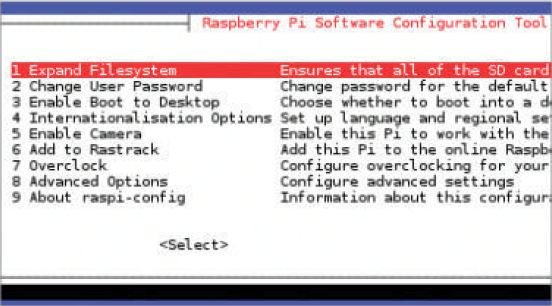
On boot up, after the initial scrolling text you’ll see the Config tool. Here you can configure many of the Raspberry Pi features quickly and easily. You can also run this tool at a later date with the command sudo raspi-config. Esc, Tab and Space can be used to navigate the tool.
05: Expand root partition
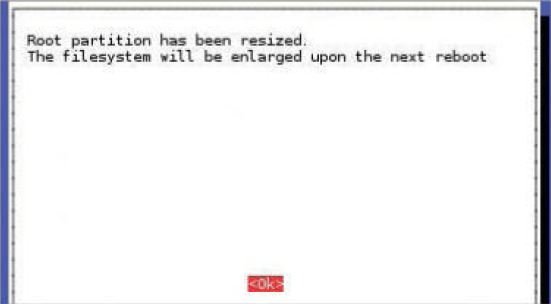
By default not all the storage on the SD card is used. By selecting the Expand Filesystem option, you can expand that partition to take up the full capacity of the SD card. This is highly recommended as it will give you far more storage capabilities.
06: Change default password

The default username and password for the Raspberry Pi is “pi” and “raspberry” respectively. It’s highly that you change the password to something more secure. Change User Password will guide you through that process. Remember this, if you lose it you will not be able to recover it.
07: Booting

The Config tool is very useful, but you don’t want to see it on every boot. While you can use the startx command to boot to the desktop it’s far more useful to Enable Boot to Desktop. The Pi will then boot directly into your desktop environment on every boot.
08: Localisation settings
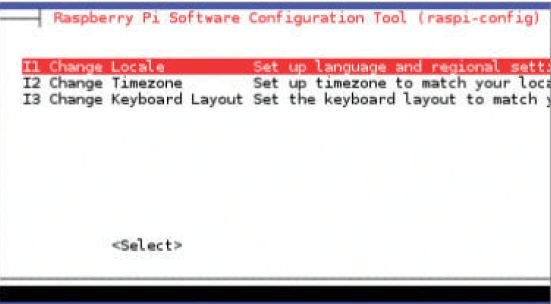
Use Internationalisation Options to change the default locale, timezone and keyboard layout. The setup will guide you through the various options with a recommended default. This is important as it’s used by applications being installed to import language settings, customisations and more.
09: Finalising the changes

After making your required changes select Finish. You’ll be asked if you would like to reboot, select Yes. This initial reboot will take longer than normal as all the changes, such as resizing the partition, are made. When done you’ll be taken to your shiny new Raspberry Pi desktop.
10: Finding network details
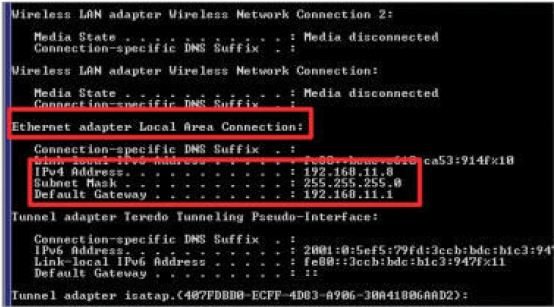
To find out your current network details head back over to your Windows PC. Use Start>Run> “cmd” to bring up a command prompt. Enter the command ipconfig. Look for your IP address and Default Gateway and note them down, you need these for the Pi.
11: Network settings
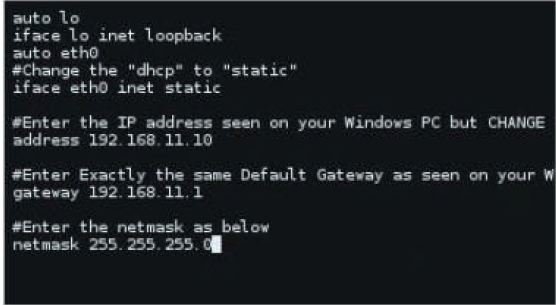
Open a Terminal window on the Pi. Enter the command sudo nano /etc/network/interfaces. Change the line starting iface eth0 to read “static” instead of “dhcp”. Enter the address details as shown in the image. Only the last digits of the IP address should differ from your Windows PC.
12: Testing connection
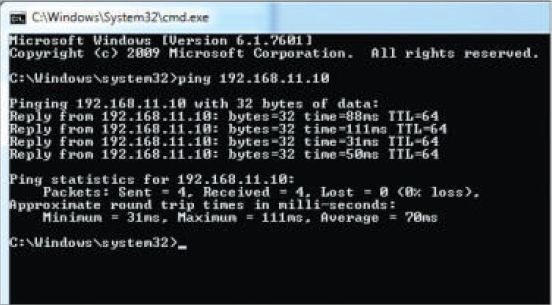
Back on your Windows PC open the command prompt again (Start>Run>“cmd”). This time run the command ping [enter IP Address of Pi]. So if you just gave the Pi an IP Address of 192.168.11.10 you would use ping 192.168.11.10. You should see a reply and no timeouts.
13: Up-to-date repositories
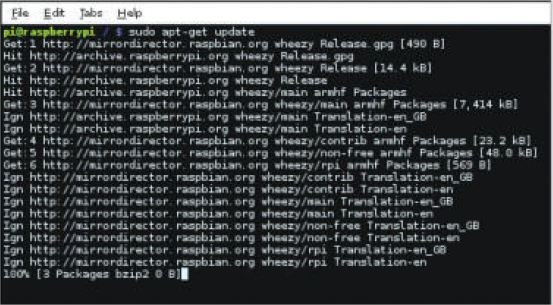
Linux uses what we call repositories. These are centralised locations of the latest and greatest software packaged and that can be downloaded and installed. These need to be kept up-to-date. Open the Terminal and type sudo apt-get update. This will get the latest locations for your software.
14: Update your software
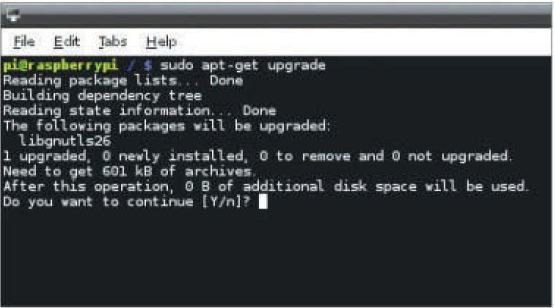
Now we have the latest repository information we can make sure all the installed software is up-todate as well. Again from the Terminal prompt enter the command sudo apt-get upgrade. If prompted answer “y” to any questions, this will upgrade any out of date application software.
15: Updating the distribution
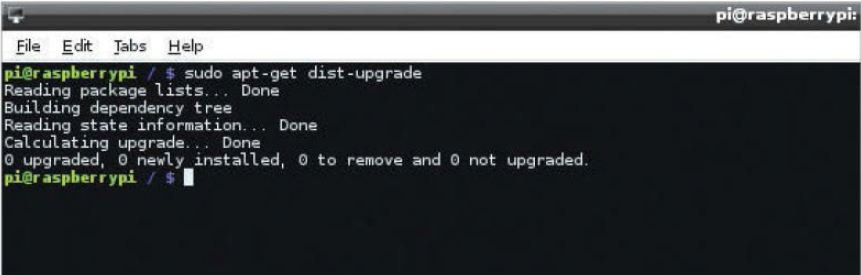
Finally we need to make sure that our distribution is up-to-date. This will include the base operating system updates such as kernel improvements, driver updates or even some distribution specific application. This time, you will need to use the command sudo apt-get dist-upgrade. Again answer “y” to any installation questions and then you’re done.
You May Want to See :
-
 Roku 2
-
 Dell Inspiron 13 5000 2-in-1
-
 Star Fox Zero
-
 Protect Your Data Using BitLocker
-
 Encrypt drives with zuluCrypt
-
 Choosing an OS for your Raspberry Pi
-
 Share your gameplay on YouTube with Google’s Streaming Service
-
 MSI GTX 980Ti GAMING 6G
-
 BenQ XL2730Z
-
 VR Gaming – Oculus Rift and Morpheus Alternative
-
 Android Studio: A Platform for Android Development
-
 MSI H97 Gaming 3
-
 Steelseries Siberia Elite Prism
-
 Dell Inspiron 13 7000 2-in-1
-
 Gigabyte X99-Gaming 5
-
 GIGABYTE H97-Gaming 3
-
 PC Specialist Trion 960
-
 Kingston HyperX Cloud II
-
 Aerocool BattleHawk Black
-
 Asrock X99 E-ITX
-
 Thermaltake Suppressor F51


Lost me on step 11
Can you be more specific?