
Running Windows 8 Using VirtualBox
Your final choice for running Windows 8 in a virtual machine is to use the free Virtual- Box software. The concepts for installing Windows 8 on it are identical to those for Parallels Desktop and VMWare Fusion, so this section is going to move pretty quickly. Refer back to the earlier sections ( Running Windows 8 Using Parallels Desktop and VMware Fusion) if you need to.
One thing to keep in mind is that with VirtualBox, you can’t migrate Windows 8 from a PC to your Mac, so if that’s your plan, you’ll have to use either Parallels Desktop or VMWare Fusion.
Install VirtualBox on your Mac and start it up. Grab a Windows 8 DVD disc, or an .iso file ready for installing Windows 8. In VirtualBox, click New. On the next screen, name your virtual machine, and select Microsoft Windows 8 as the operating system. Click Continue.
On the next screen you’re asked exactly how much RAM to devote to Microsoft Windows 8 (See Image Below). The default is 2 GB, but some people have stated being able to use only 1 GB. I recommend going with the default.
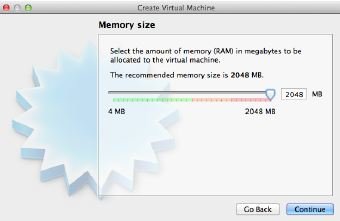
Choosing how much RAM to devote to Windows 8 in VirtualBox
After that, you’re asked to create a virtual hard drive. You’ve got several other options here. Go with the default size of 25GB and click Create. For the type of hard drive to create, you have got half a dozen options. For example, one of them is to create an HDD (Parallels Hard Disk), in which case you’ll also be able to use it with Parallels Desktop if the sun and stars align. But your best bet here is to go with the default, VDI (VirtualBox Disk Image).
Next, you’re asked whether the hard drive should be of a fixed size or one that dynamically changes based on how much space it requires. The default is to choose a dynamically allocated drive, and I’ve found that to be a good choice. If you prefer, you can instead choose “Fixed size.” That partition will take more time to create than a dynamically allocated one; however, it might lead to faster performance.
After all that, you come to a screen summarizing the name of the virtual drive and the size you’ve told it to be. You can make final changes here. Otherwise, click Create and the hard drive is created (See Image Below).

Creating the virtual hard drive in VirtualBox where you’ll install Windows 8
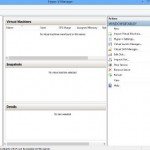
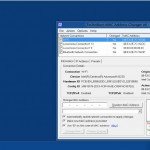
At that point, you’ve created a virtual hard drive and machine where you’ll install Windows 8. You’ll be sent to a screen (Virtual Box interface), shown in following image.

The VirtualBox manager interface
That summarizes all of the settings you’ve chosen for when you install Windows 8. The screen lists all of your virtual machines. Click Windows 8. If you’re adventurous, you can try fiddling around with these settings, such as for how much video memory to use, and etc. But keep in mind that they’ve been pre-chosen to work well with Windows 8, so my suggestion is to stay with the defaults. Now you are ready to install Microsoft Windows 8. Select the Microsoft Windows 8 machine you have just created and press Start. On the next screen, choose either the disc where you have the Windows 8 installation DVD, or else the .iso file you’re going to use. And then click Start. From here on, it’s just like a normal Microsoft Windows 8 installations.
You May Want to See :
-
 Installing and Running Windows 8 Using VMWare Fusion
-
 Run Multiple OS Inside Windows 8 Using Hyper-V
-
 Installing and Running Windows on a Mac
-
 Force Desktop applications to Show up on the Start Screen
-
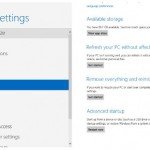 Reset and Refresh Windows Instead of Doing a Complete Reinstall
-
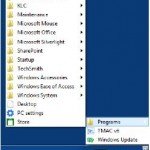 Enable Start Menu for Windows 8 Without Using Software
-
 Speed Up Windows 8 Boot Time
-
 Keep your computer up to speed
-
 How To Install Ubuntu Linux On Your Computer Or Laptop
-
 Accessing Windows 8 System Recovery Console
-
 Change Folders in the Open Dialog Box
-
 Tweak Windows 8 Start Screen
-
 Enable Windows “God Mode” on the Desktop
-
 Run the Desktop and Window 8 Native applications Side by Side
-
 Bring Back the Quick Launch Toolbar to the Desktop
-
 Enable the Microsoft Windows 8 All applications Screen
-
 Use the Built-In Mini Start Menu Windows 8
-
 Make the Desktop More Tablet-Friendly
-
 Create an Application Folder for Quick Launches on the Desktop and the Start Screen
-
 Sync files with OneDrive
-
 Enable the Classic Windows Start Menu to Microsoft Windows 8


