
Set up a digital media library in Windows
Most of us have music, movies and photos stored on our PCs, but how can we access them from other computers, mobiles and smart devices without creating extra copies? The solution is to set up a media server, and Media Browser is the perfect tool for the task, particularly if you want to set up shared access with members of your family or housemates. Media Browser organises your movies, TV shows, music and more into user-defined libraries, automatically downloading artwork and useful information such as episode synopses to help everyone easily browse and access what they want to watch. You can set up separate user accounts for each person in your house, and regulate access using parental controls and other restrictions. It all adds up to a win-win in the media-sharing stakes. Read on to find out how to set it up.
1. Install server
Install Media Browser Server from the cover disc. Wait while the installer verifies its requirements, then click ‘Run’ when you see the Application Run security warning dialog box. From here, Media Browser will download the latest version of its setup file and install it automatically. Once installation is complete, your browser will open to the Media Browser configuration wizard.

Install Media Browser Server
2. Create user
First, click the English (United States) drop-down menu and choose ‘English (United Kingdom)’ before clicking ‘Next’. Media Browser supports multiple user profiles, allowing friends and family members to access your media collection using their own settings (you can also configure parental controls). For now, verify that your first name is correct and click ‘Next’ again.

Create user
3. Set up media library
You’ll now be prompted to select your first media folder. For Media Browser to work correctly, your media files must be named and organised correctly – click the ‘Refer to the media library wiki’ link for brief details. Once your media is named correctly, click ‘Add media folder’.

Set up media library
4. Select first folder
Give your first folder a suitable name to reflect its content, such as ‘TV – Comedy’. Select the folder type from the drop-down menu and click ‘OK’. Click the ‘Media Locations’ button to select the folder on your hard drive containing the media in question. Click the arrow next to the drive letter to browse its contents. Click again to drill down until you open the target folder, then click ‘OK’.

Select first folder
5. Create more libraries
You can add multiple folders to the same library if you wish – click the ‘Add media locations’ button to select them. You’ll also see buttons for editing your library; you can rename it, change its type and remove it completely. Once you’re happy with this media library, click ‘Add media folder’ to create another one following the same steps. When everything is in place, click ‘Next’.

Create more libraries
6. Configure settings
You’ll be prompted about downloading artwork and metadata from the internet – leave this box ticked so Media Browser can display posters and episode information about your media collection when browsing. It’s up to you if you wish to save this into your media folders, but unless you plan to edit it, leave this option unticked. Set country to United Kingdom, then click ‘Next’.

Configure settings
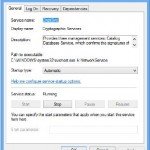
7. Final steps
Leave the next three boxes ticked and click ‘Next’. Ignore the comment about Windows Service – for the purposes of this tutorial we’re sticking with the desktop application. Click ‘Next’ then ‘Finish’. You’ll be taken to the main Media Browser dashboard – scroll down to the Running Tasks section to see a progress bar indicating how much of your media has been added to the library.

Final steps
8. Configure users
Select ‘Users’ in the left-hand pane and click ‘Add User’ to set up more users. Unless they’re trusted, untick ‘Allow this user to manage the server’ before clicking ‘Save’. If the user is a child, click their username in the list and switch to ‘Library Access’. Choose which libraries they can view, and set parental ratings (including the blocking of material with no rating attached). Click ‘Save’.

Configure users
9. Personal preferences
Click the person icon at the top of the screen and choose ‘My Preferences’. If you’ve set up multiple libraries for different types of content (such as comedy and drama TV), untick them under ‘My Views’ so they appear as separate categories. Use the ‘Web Client’ tab to customise how your personal homepage is displayed when accessing your media collection through a web browser.

Personal preferences
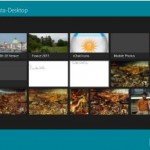
10. Enjoy your media
With your server set up, click the ‘Home’ button in the top left-hand corner of the screen to browse your library through your web browser. From here you can play media through your web browser, or install Media Browser Theater (Windows 7 or later) from the cover disc if you prefer. You can also purchase apps for various mobile devices so you can watch your media on the go.

Enjoy your media
You May Want to See :
-
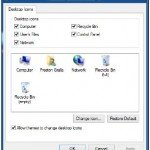 Put Helpful Navigation Icons on the Desktop
-
 Disable / Bypass Windows 8 Lock Screen
-
 Manage Multiple Cloud Service Storage Space at Single Location with MultCloud
-
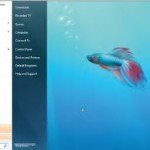 Optimize the Start Menu
-
 Keep your computer up to speed
-
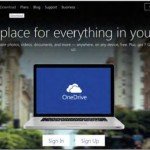 Sync files with OneDrive
-
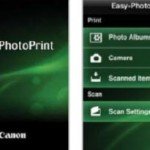 Printing with your phone – Canon Selphy CP910
-
 Western Digital My Passport Wireless 2TB
-
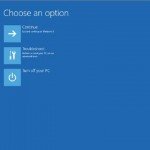 Accessing Windows 8 System Recovery Console
-
 Speed Up Windows 8 Boot Time
-
 How To Secure Wireless Computer
-
 Installing and Running Windows 8 Using VMWare Fusion
-
 Controlling PC From Android Tablet
-
 How To Install Ubuntu Linux On Your Computer Or Laptop
-
 Simple Way to Encrypt Files
-
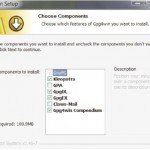
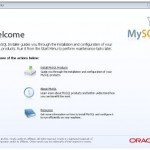 How To Install MySQL on Linux, Windows, And Mac
-
 Speed Up Windows Startup
-
 The Dirty Truth About Security Loopholes
-
 Use Your Own Image for Your User Account Windows 8
-
 Prevent SQL Injection by Using Runtime Protection
-
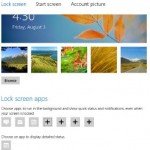 Modify Windows 8 Lock Screen


