
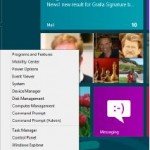
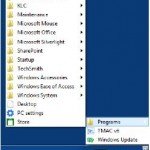
Optimize the Start Menu
Unlike the start menu in Windows 8, The Start menu in Windows 7 is quite similar to the old one from Windows XP and Vista, but Microsoft made some subtle, yet significant improvements to make it even more useful. As before, it’s divided into three different areas. The first of these is the top section, where you can pin your favourite programs so they are always easy to access when you want them. Below this – with a line separating it from the pinned programs area – you’ll find the recently-used programs list. To the right of this is the part of the menu that takes you to commonly-used folders and options, such as your Music library and the Control Panel. As good as it is though, there’s still some room for improvement. In this eight-step guide, we’ll show you how to make the most of your menu by personalising it to suit your needs.
1 Pin your favourite programs
When you want to access your most commonly used programs, the best place to put them is in the Pinned Programs area at the top of the Start menu. To do this, right-click a program and select ‘Pin to Start menu’, or drag-and-drop it into position. If you want to remove a program from the Start menu, right-click again and select ‘Unpin from Start Menu’.

Pin your favourite programs
2 Streamline the menu
When you open a program, it’s automatically added to the list of recently-opened programs on the left. If you want to change the number of programs that appear here, right-click the Start button, select ‘Properties’ and under the ‘Start Menu’ tab, click on ‘Customise’. Enter the new figures in the box labelled to ‘Number of recent programs to display’.

Streamline the menu
3 Open old files quickly
If you open the Start menu, you might notice that certain programs (including Microsoft Word and Excel) have an arrow next to them. When you click this, you’ll be presented with a Jump List, which shows you which files you’ve recently opened in that particular program. You can open them without having to spend time browsing through your Documents library.

Open old files quickly
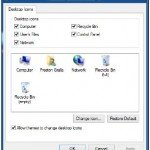
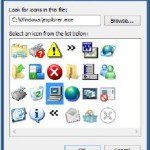
4 Change your picture
At the top of the Start menu is a small picture that represents your user account. If you fancy a change of scenery, click on ‘Control Panel > User Accounts and Family Safety > User Accounts’ and click on ‘Change your picture’. Choose a new image from the list, or click on ‘Browse for more pictures’ to use one of your own. Pictures should be 128×128 pixels in size.

Change your picture
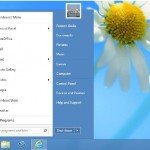
5 Get a new power button
When they want to turn off their Windows 7 computer, most people open the Start menu and click ‘Shut down’, but you can change what this button does if you don’t often shut down your PC fully. Right-click the ‘Start’ button, and under the ‘Start Menu’ tab click on the drop-down menu next to ‘Power-button action’ to change it to something else, such as Restart or Sleep.

Get a new power button
6 Change the links
On the right of the Start menu are links that take you to your most frequently used folders and libraries. You can remove any that you don’t want to appear by right-clicking the Start button, selecting ‘Properties’ and clicking on ‘Customise’. Select ‘Don’t display this item’. If you want to create a menu within each link here, click ‘Display as a menu’.

Change the links
7 Move the Start menu
The standard location of the Start menu is at the bottomleft of the screen, but you can move it to the top or right of the screen if you prefer (if it’s blocking your desktop wallpaper, for example). Right-click the Taskbar, and make sure there is no tick next to ‘Lock the Taskbar’. Then left-click the Taskbar and drag it to another area of the screen to move it.

Move the Start menu
8 Make it work
All this should take around 10 minutes, and once you’re done, you should find that the Start menu is vastly improved over its standard configuration. You can access programs that you want to use more quickly, make your PC easier to control and change the look to suit your taste. A few minutes of work will save you hours in the long run if you use your PC regularly.

Make it work
You May Want to See :
-
 Use the Built-In Mini Start Menu Windows 8
-
 Tweak The Control Panel Windows 8
-
 Add Folders and Other Objects to the Start Screen
-
 Enable the Classic Windows Start Menu to Microsoft Windows 8
-
 Sync files with OneDrive
-
 Put Helpful Navigation Icons on the Desktop
-
 Bring Back the Quick Launch Toolbar to the Desktop
-
 Put a Tile to Computer on the Start Screen
-
 Modify Windows 8 Lock Screen
-
 Enable Windows “God Mode” on the Desktop
-
 Set up a digital media library in Windows
-
 Run Multiple OS Inside Windows 8 Using Hyper-V
-
 Keep your computer up to speed
-
 Create an Application Folder for Quick Launches on the Desktop and the Start Screen
-
 Enable Start Menu for Windows 8 Without Using Software
-
 Make the Desktop More Tablet-Friendly
-
 Use Your Own Image for Your User Account Windows 8
-
 Tweak Windows 8 Start Screen
-
 Change Folders in the Open Dialog Box
-
 Windows 9 Scheduled to Release in 2015
-
 Controlling Live Tile Behavior Windows 8


