
Blend faces together
It’s said that all humans alive today can trace their DNA back to a single female nicknamed Mitochondrial Eve. Yet despite this common lineage, most of us look completely different. Some unrelated people can look very similar though – have you met your doppelgänger?
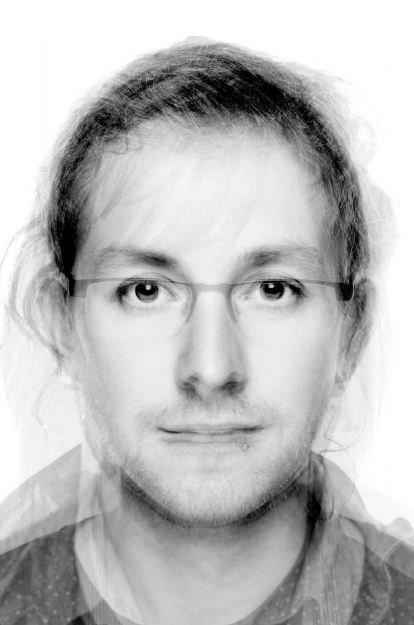
Using this fun technique you can create a kind of doppelgänger for a whole group of people. An aspect of everyone’s faces will be visible, but few individuals will be immediately recognisable. Trust us – this will keep you, your family and friends laughing in amazement for hours!
Choose your models
The wonderful thing about this technique is that you can merge as few as two faces, or as many as you like, to complete the effect. So you could blend the faces of a couple, a family, a group of friends or a much wider group such as work colleagues or all the people who live in your street.

The technique is most fun when you blend generations of the same family. This is due to the similarities you’ll find, such as where children look like both of their parents. The potential group options for blending are almost endless, and the end results are always interesting.
The most important thing to do is take a series of portraits that are as identical as possible in terms of settings and composition. To help with this it’s worth turning on the grid view in your camera’s viewfinder. Also make sure that you’re standing roughly the same distance away from your model when taking each shot. Working like this will help to maintain consistency and make blending them together in Photoshop a much easier job later on. For more shooting tips and camera settings, take a look at the guide below.
Shooting the ten individual portraits we merged
The average face technique is very simple to shoot, and can be completed in just a few minutes. Use a white wall next to a window, or set up a white sheet of card outside in the shade. This will create a perfectly plain background.
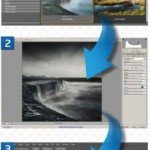
Set the camera to ISO 100 in aperture-priority at f/5.6. When shooting a tight head and shoulders shot you’ll need to use exposure compensation to add roughly 1 stop of overexposure. Just take a few test shots to begin with, and then exposure should remain identical for each portrait. Now ask your models to stand in front of the card facing the camera. Combine your portraits in Photoshop with the shooting stage finished it’s time for the real fun to begin. This technique relies on Photoshop or Elements to merge the individual images together. It’s an easy process that provides a light-hearted way to gain an understanding of Layer hierarchy…
- Open all of your portraits
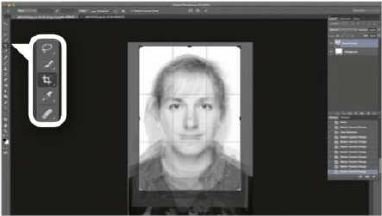
Press Ctrl+O to locate the folder containing your portraits and open them all in Photoshop. Click on each tab to locate the smallest face. This image will be your starting point because all the images will be made smaller to fit this one. Some faces are naturally smaller, while a change of shooting position is the other reason for one face in the set being smaller than the others.

- Copy & paste your portraits
Click on one of the other portraits, hold down Ctrl+A to Select All and then Ctrl+C to Copy. Click on the X on the tab to close the image. Click back onto your starting image and press Ctrl+V to Paste. The new image will paste directly over the original. Next go to the Layers palette and set the Opacity of this Layer to 50%. This will allow you to line up the images using the eyes as a guide. - Refine the Layer transform
Press Ctrl+T to open the Transform controls. Hold down Shift, left-click your mouse and drag one of the corner control boxes inwards to resize the image so the eyes line up. If you need to straighten the Layer, hover the mouse above one of the corner boxes until a double-ended arrow appears. Now left-click and drag the mouse to rotate the Layer. When you’ve finished, click the tick box or hit Enter.
- Repeat steps to create a Layer stack
Once each Layer has been Transformed, click on the eye next to the Layer to hide it. Repeat Steps 2 and 3 for each portrait Layer. Now set the Opacity for the Background Layer to 100%, Layer 1 to 70%, 2 to 65%, 3 to 60%, 4 to 55%, 5 to 50%, 6 to 40%, 7 to 30%, 8 to 20%, 9 to 10%, and 10 to 5%. The Layers have to be set this way as images at the top of the Layer stack need a lower opacity than those at the bottom.
- Crop the image for a neat finish
With some of the Layers resized their hard edges will be visible in the image, even at a reduced opacity. To fix this we simply need to crop the image. Press C on the keyboard to activate the Crop Tool. Make sure Original Ratio is visible in the Tool menu bar and resize the crop guide by left-clicking your mouse and dragging the corner control boxes. Hit Enter when you’re happy.
You May Want to See :
-
 Create Geometry Effects Photoshop
-
 Reveal everything with shadows and highlights using Photoshop
-
 Simple way to remove object inside picture using Adobe Photoshop
-
 How to Invert Image In Photoshop Lightroom
-
 Manage Your Photos From Capture to Output in Three Stages
-
 Create A Seamlessly Repeating Pattern
-
 Repair Old Photo and Image Using Photoshop Elements 12
-
 Create A 3D Chess Set with Photoshop
-
 Best way to light a chocolate scene
-
 How to Process RAW Files in Adobe Camera Raw
-
 Make a Photo Look Old
-
 Enumerations in Swift Programming
-
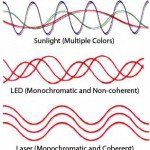 What is Monochromatic Light ?
-
 How to Test and Debug A Program
-
 How to Make A Good eBay Listing That Can Attract Buyers
-
Simple Way to Connect Swift to PHP Code
-
 Handling with Objects and Classes in PHP
-
 5 Tips To Make you Live Longer Based on Research
-
 Variables and Types – Python Programming
-
 Enable Windows “God Mode” on the Desktop
-
 Speed Up Windows Startup


