
Create A 3D Chess Set with Photoshop
If you’ve ever wanted to add 3D objects to a 2D photo, then this big project will show you how. We’ll take you through the process of making a chess board. We’ve coloured and ordered the pieces along party lines, but you can use the same techniques to create and manipulate all kinds of 3D objects directly within Photoshop without any need for dedicated 3D software.
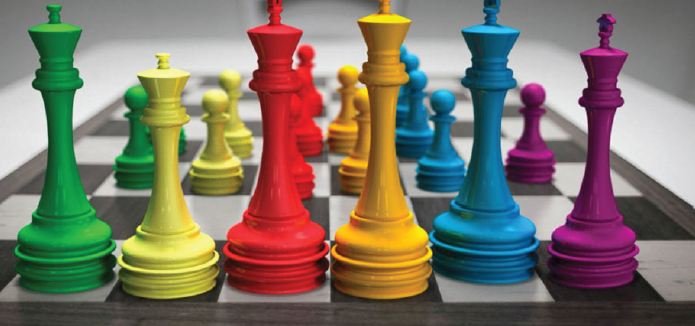
The key here is to make a good cross-section of each piece with the Pen tool (there are readymade paths within the starting image), then extrude and bend the shape to make a circular object. Once done, you can colour, light and position lots of similar pieces. It’s a great introduction to 3D in Photoshop. We’ve created kings, queens and pawns to keep with the political theme, but you can make rooks, bishops and knights using the same 3D techniques.
DOWNLOAD PROJECT FILES HERE http://tiny.cc/zpkbxx ON YOUR PC OR MAC
- MAKE A SHAPE
Open chess_board.psd. We’ll define the cross-section of the first chess piece. To do this you can draw a path with the Pen tool to create half a cross-section of the desired shape, or use the path supplied within the document. Go to the Paths panel (Window>Paths) and highlight the Queen path. Make a new layer and name it Queen, then go to 3D>New 3D Extrusion from selected Path.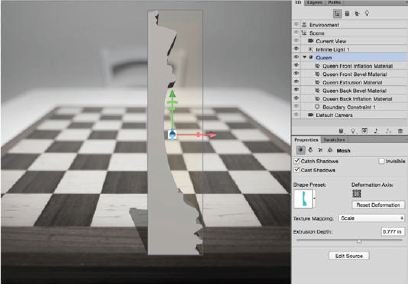
- ROTATE THE EXTRUSION
Click Current View in the 3D panel, then grab the Move tool. Click the Orbit icon in the tool options, then drag to see the 3D shape at an angle from above. Highlight the Queen shape in the 3D panel, then go to the Properties panel and click the Deform icon at the top. Set Horizontal Angle to -360, then drag the Extrusion Depth slider until the shape looks right.
- RESTORE THE PERSPECTIVE
Go to the Layers panel and hide the Queen layer, then highlight the background layer and go to Filter>Vanishing Point. Click to make a box shape that follows the lines of the chess board in the image. When you’re happy with the alignment of the box on the board, click OK. Next, you can use the grid to match the perspective in the scene with your 3D objects.
- CHANGE THE CURRENT VIEW
Highlight the Queen layer again, then go to the 3D panel and click Current View. Go to the Properties panel, then set View: Vanishing Point Grid. The view of the Queen piece will alter to match the perspective of the grid. Next, grab the Move tool, click the object and drag the centre cube of the axis widget to scale it down to a suitable size.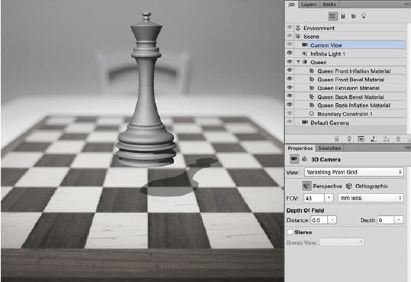
- FIT THE PIECE TO THE SCENE
Go to 3D>Move Object to Ground Plane (you can then go to View>Show>3D Ground Plane to hide it), then use the Move along X or Move along Z axis arrows to drag the chess piece around the image (if necessary, rotate it around the Y axis to make it easier to position). Notice how it now matches the perspective of the chess board.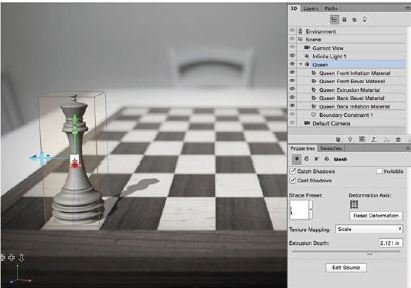
- COLOUR THE OBJECT
Go to the 3D panel and click Queen Extrusion Material. We can use the Properties panel to change the appearance of the object. Click the Diffuse colour box and choose a colour, then set Shine 37%, Reflection 19%, Roughness 5%. To check the results, grab the Rectangular Marquee tool, select a small area of the shape, then do a test render by clicking the Render icon.
- MATCH THE LIGHTING
Grab the Move tool and click Infinite Light in the 3D panel. Drag the handle up so that the light comes from above, like in the background image. Go to the Properties panel and increase the Shadow softness to 30%. Add a second infinite light: click the Light icon in the 3D panel and choose Infinite Light, then direct it from the right, lower the intensity and increase the Softness.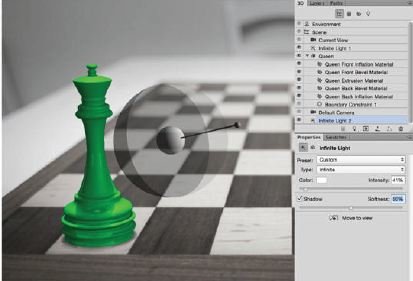
- ADD THE REFLECTIONS
We can add a subtle reflection on the board to help ground the shape. Go to the 3D panel and click Environment. Go to the Properties panel and set the Ground Plane reflections to about 20%, roughness 40%. Once again, make a rectangular selection and click the Render button in the Properties panel to check the effect, then adjust the settings if necessary.
- MAKE A PAWN
Make a new layer and name it Pawn, then go to the Paths panel, click the Pawn path, then extrude it to a 3D shape. Once done, press Cmd/ Ctrl+E to merge the Pawn layer with the Queen. Go to the 3D panel and click Pawn, then go to the Properties panel, click Coordinates and make sure X, Y and Z rotation are all zeroed, then use the Move tool to position the piece on the board.

- MATCH THE MATERIAL
Highlight the Queen Extrusion Material, click the material preset drop-down menu, then click the flyout menu and choose New Material to save the green material as a preset. You can then highlight the Pawn Extrusion Material and apply the green preset. Next, right click Pawn in the 3D panel, choose Duplicate Shapes, then use the Move tool to reposition the copy.
- MAKE A KING
Make a 3D shape for the King Body path. Once done, make a new layer, highlight the King Path (top) path, then again go to 3D>New 3D Extrusion from Path. This time, just use the Extrusion depth without rotation, then position the shape on top of the king piece (use the coordinates to reset any rotation). Highlight all the 3D layers and press Cmd/Ctrl+E to merge the layers.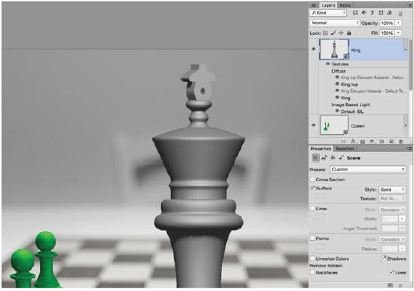
- ADD ANOTHER COLOUR
Go to the 3D panel, highlight the two King shapes, right click and choose Group Objects. Click parts of the King piece to highlight the Extrusion material, then go to the Properties panel, add the green material preset and change the Diffuse colour to Red. Next, duplicate a few of the Pawn shapes, move them behind the red piece, and change the colour.
- BUILD UP THE REST OF THE SET
Continue adding more pieces and colouring them in the same way to build up the pieces on the chess board. Use the Slide Object Move tool to move the pieces around the board, and make sure they all line up with the ground plane. It can be useful to store your chosen colours as swatches in the Swatches panel for easy access and to keep them consistent.
- DISTORT THE SHAPES
Once you’re happy with the position and colouring of your pieces, you could try distorting some of them slightly so that they look less uniform. Use the axis widget to scale along Y to stretch the sizes slightly, then make sure you go to 3D>Move to Ground Plane once you’ve finished to reset the positions, else the pieces won’t look quite right.
- APPLY SHALLOW FOCUS TO THE IMAGE
Finally, we can add a depth-offield effect to mimic the shallow focus in the background scene. Go to the 3D panel and click Current View, then set Depth of Field Distance 0.28, Depth 2.2. Click the Render button to render the scene. This may take a while. Once it’s finished, press Cmd/Ctrl+Shift+Alt+E to merge a 2D layer of your scene, then save it.

You May Want to See :
-
 Create A Seamlessly Repeating Pattern
-
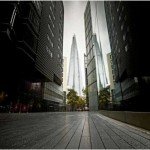
 How to create 3D urban City model
-
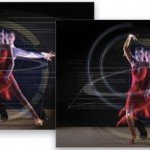 Create Geometry Effects Photoshop
-
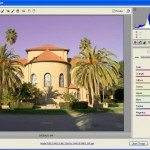
 Repair Old Photo and Image Using Photoshop Elements 12
-
 Best way to light a chocolate scene
-
 Make a Photo Look Old
-
 Manage Your Photos From Capture to Output in Three Stages
-
 Simple way to remove object inside picture using Adobe Photoshop
-
 How to Invert Image In Photoshop Lightroom
-
 Reveal everything with shadows and highlights using Photoshop
-
 Blend faces together
-
 How to Process RAW Files in Adobe Camera Raw
-
 Picasa
-
 Essential Photography Tips & Tricks
-
 Set up a digital media library in Windows
-
 Zeiss Otus 55mm f/1.4
-
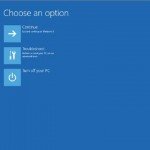 Accessing Windows 8 System Recovery Console
-
 Printing with your phone – Canon Selphy CP910
-
 Simple Way to Locate Stolen or Lost Phone
-
 Viveza 2
-
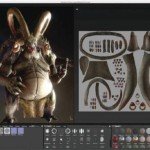 Substance Painter


Where i can download project files? That link is broken